Using a hedge trimmer effectively requires more than just powering it on—proper technique, safety protocols, and understanding your tool’s capabilities are essential for clean, healthy results. Whether you’re a novice gardener or a seasoned pro, this comprehensive guide breaks down the process into actionable steps, ensuring precision and safety.
1. Pre-Use Preparation: Set Up for Success
A. Tool Selection & Inspection
- Choose the Right Trimmer:
- Electric (Corded/Cordless): Best for small to medium hedges. Corded models offer consistent power but require a grounded 3-prong extension cord (16-gauge or thicker, UL-certified) with a residual current device (RCD) for safety. Cordless trimmers provide mobility but check battery life (40–60 minutes typical run time).
- Gas-Powered: Ideal for large, dense hedges. Ensure fuel mix (2-stroke models: 50:1 gas-oil ratio) is fresh and engine is properly maintained (clean air filter, sharp blades).
- Inspect Before Use:
- Check blade sharpness—dull blades tear foliage, increasing disease risk.
- Test safety features: trigger locks, dual-hand switches (mandatory for electric models), and blade guards.
- For corded trimmers, confirm extension cord integrity—no frays or exposed wires.
B. Personal Protective Equipment (PPE)
Always wear:
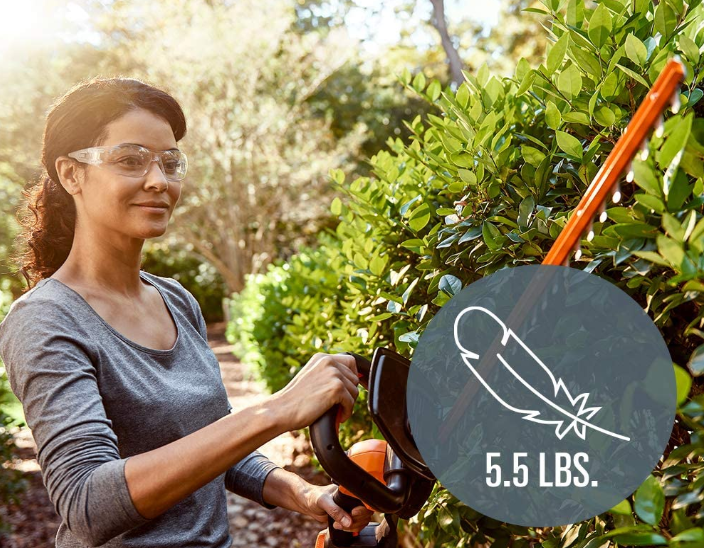
- Eye Protection: Impact-resistant goggles or face shields (to block debris).
- Hearing Protection: Earmuffs or earplugs (trimmers exceed 85 dB—OSHA’s safe exposure limit).
- Gloves: Heavy-duty leather or cut-resistant gloves for grip and puncture protection.
- Appropriate Clothing: Long sleeves, pants, closed-toe shoes, and a dust mask (for gas trimmers’ fumes).
2. Step-by-Step Trimming Technique
A. Establish the Desired Shape
- Plan the Design: Sketch or visualize the hedge’s final form (e.g., rectangular, 锥形,or naturalistic). Formal hedges require precise angles; informal hedges allow softer lines.
- Timing Matters:
- Evergreens: Trim after spring growth hardens (late summer for most species).
- Deciduous Hedges: Prune after flowering (for bloom-bearing varieties) or in late winter for structural cuts.
- New Hedges: Focus on formative pruning in the first 2 years to encourage bushy growth (see Hedge Trimming Timing Guide for species-specific details).
B. Basic Handling Principles
- Two-Handed Grip: Grasp the main handle with your dominant hand and the front auxiliary handle with your non-dominant hand for stability. Keep elbows close to your body to reduce vibration strain.
- Start Low: Begin at the lowest speed setting to acclimate to the trimmer’s balance and vibration. Increase speed gradually for dense growth.
C. Shaping the Hedge
- Top Surface (for Formal Hedges):
- Hold the trimmer horizontally, blades parallel to the ground. Move in slow, steady side-to-side motions, starting from one end and working to the other. Maintain a slight slope (1–2°) to shed water, preventing fungal growth on flat tops.
- Sides:
- For vertical sides, position the trimmer blade vertically and glide upward from the base to the top, maintaining a 2–3” “shoulder” at the top (wider at the base than the top to allow sunlight penetration to lower branches).
- For rounded tops, use upward arcing motions, starting 3–4” below the desired peak and curving the blade outward as you reach the top.
- Avoid Inward Cutting at the Base:
- Always angle cuts slightly outward at the base to prevent a “V” shape, which causes lower branches to die from lack of sunlight. The ideal hedge cross-section is trapezoidal (wider at the bottom).
D. Thinning & Detail Work
- Remove Dead/Overcrowded Growth: Use bypass pruners (not the trimmer) for branches >½” thick to avoid blade damage. Cut at a 45° angle just above a healthy bud or lateral branch.
- Sculpting: For intricate shapes (e.g., topiaries), use a trimmer with a 14–18” blade for precision. Step back frequently to assess symmetry.
3. Safety Best Practices: Non-Negotiable Rules
A. Operational Safety
- Stay Grounded: Never stand on ladders or unstable surfaces. Use a stable platform for tall hedges, keeping both feet firmly on the ground.
- Weather Awareness: Avoid trimming in wet conditions (electrical hazard for corded trimmers, increased slip risk). For gas trimmers, never refuel while hot—wait 30 minutes to cool.
- Heat Management: Take 15-minute breaks hourly to prevent hand fatigue and overheating (especially with gas models).
B. Machine Control
- Blade Guard Use: Always engage the blade guard when transporting or storing the trimmer.
- Power Off for Adjustments: Unplug (electric) or turn off the engine (gas) before clearing jams, changing blades, or moving to a new work area.
- Cord Safety (Electric Models): Keep the power cord behind you at all times to avoid cutting it. Use a cord minder or attach it to your belt for better control.
4. Post-Trimming Maintenance
A. Clean the Trimmer
- Debris Removal: Use a stiff brush or compressed air to clear sap, leaves, and twigs from blades and motor vents. Wipe blades with a cloth dipped in mineral oil to prevent rust (especially for wet environments).
- Lubrication: Apply silicone-based lubricant to moving parts (hinges, pivots) and blade edges to maintain smooth operation.
B. Store Properly
- Electric Trimmers: Store batteries in a cool, dry place (avoid fully discharging lithium-ion batteries). Hang corded trimmers to prevent cord kinks.
- Gas Trimmers: Drain fuel or add a fuel stabilizer if storing long-term. Keep in a well-ventilated area away from living spaces.
C. Landscape Cleanup
- Debris Management: Use a leaf blower or rake to gather clippings. Compost healthy trimmings (avoid those with diseases or pests).
- Hedge Health Check: Apply a balanced fertilizer (e.g., 10-10-10) if the hedge shows signs of stress, and water deeply if trimming during dry periods.
5. Troubleshooting Common Issues
| Problem | Cause | Solution |
|---|---|---|
| Blade vibration/noise | Dull blades or loose bolts | Sharpen blades; tighten blade bolts |
| Electric trimmer stalls | Overloaded motor or dead battery | Let motor cool; charge/replace battery |
| Gas trimmer won’t start | Old fuel, clogged carburetor | Drain old fuel; clean carburetor |
| Uneven cuts | Inconsistent blade angle | Practice slow, controlled movements |
Final Recommendations for Professional Results
- Practice on Non-Critical Areas: New users should first trim a less visible section of the hedge to build confidence.
- Respect Plant Biology: Never remove more than ⅓ of a hedge’s foliage in one session to avoid stressing the plant.
- Annual Tool Service: Have gas trimmers serviced by a professional annually; replace electric trimmer blades every 2–3 years.
By following these steps, you’ll transform hedge trimming from a daunting task into a precise, efficient process—enhancing your landscape’s beauty while ensuring plant health. Always prioritize safety, and remember: the key to mastery is consistent, mindful practice.
